
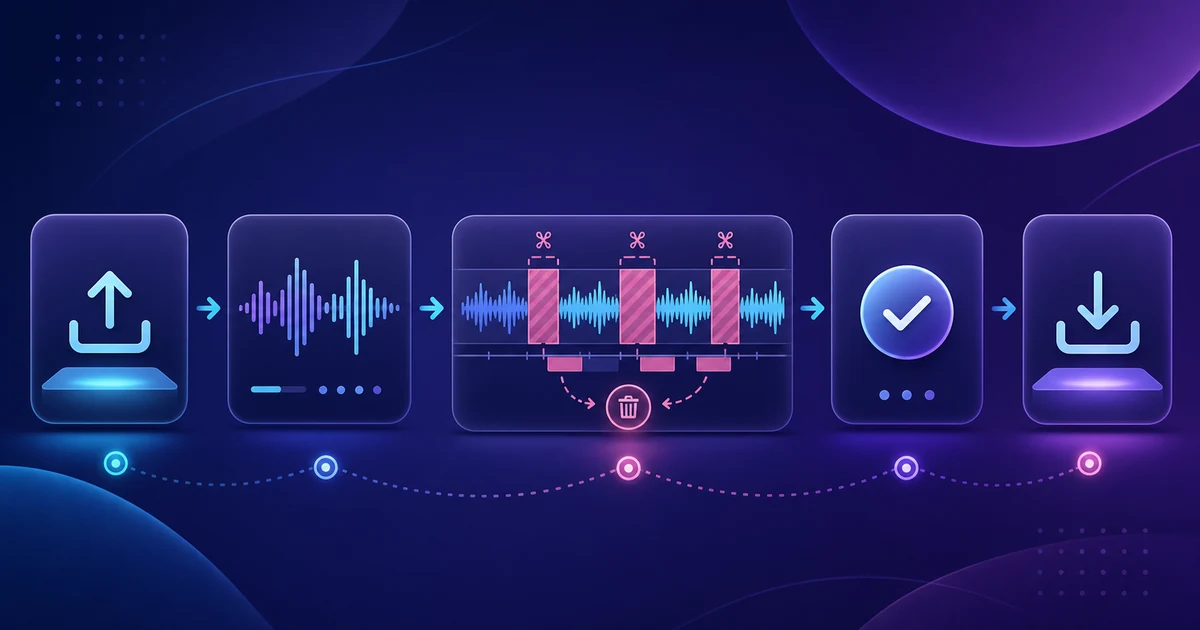
What You'll Create
In this guide, you will use VMAI's Auto Cut Editor to reduce long silence and dead space in a video or audio file.
By the end, you will know how to:
- Upload a video or audio file.
- Choose between audio silence detection and motion stillness detection.
- Adjust threshold, margins, and silent-section behavior.
- Run a preview analysis to check the expected reduction.
- Check estimated Credits and download a result file or editor timeline.
Before You Start
Requirements
- A VMAI account.
- The video or audio file you want to edit.
- A short sample file for your first test. A 10-30 second clip is enough to learn the settings.
- A backup of the source file. If the first result is too tight or too loose, you can change settings and try again.
Supported Formats and Credits
The current verified UI and code support these input formats.
| Type | Supported formats |
|---|---|
| Video | MP4, MOV, AVI, MKV, WebM |
| Audio | WAV, MP3, M4A, OGG, FLAC, AAC |
Auto Cut Editor renders a new result, so it uses Credits. The current file-input rate is 1 Credit per started minute, with a minimum of 1 Credit. URL input can add 0.5 Credits per minute for server-side download.
Preview analysis helps you check the expected result before rendering. Before you click the render button, review the page's Estimated Cost and Available Credits.
Step 1: Open Auto Cut Editor
Open Auto Cut Editor.
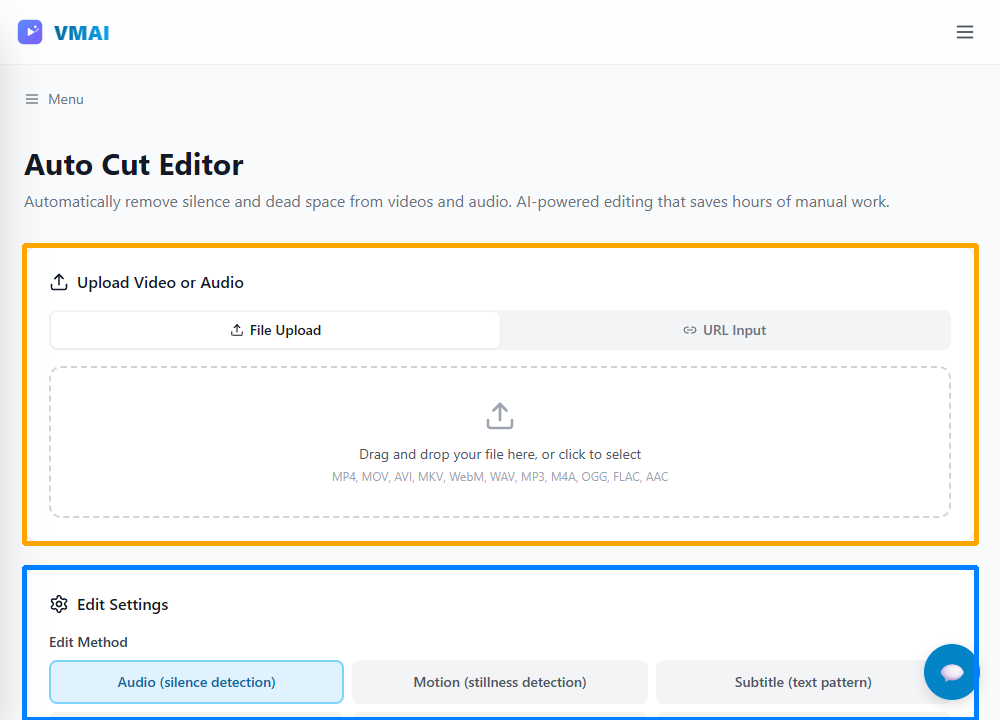
Start with two areas on the page.
| Area | What It Does |
|---|---|
| Upload Video or Audio | Drag and drop a file or choose one from your device. A URL Input tab is also available. |
| Edit Settings | Choose audio, motion, subtitle pattern, combined logic, or manual editing. |
Step 2: Choose File Upload or URL Input
The default path is File Upload. Click the upload area or drag your file into it.
After upload, VMAI reads the duration when possible and uses that duration for the Credit estimate. If the browser cannot detect duration, editing cannot start; try another file or browser.
URL input is also available, but beginners should start with file upload.
- File upload can use preview analysis.
- URL input can add a server-side download surcharge.
- YouTube URLs are not processed directly; the UI guides you back to the upload flow.
Step 3: Pick an Edit Method
For your first test, choose Audio (silence detection). It works well for courses, interviews, podcasts, and explanation videos where the main issue is long pauses between speech.
Other methods are useful in different situations.
| Edit Method | Best Use |
|---|---|
| Audio (silence detection) | Reduce long pauses between spoken parts. |
| Motion (stillness detection) | Reduce video sections where the frame stays still. |
| Subtitle (text pattern) | Keep sections based on matching subtitle text. |
| Combined (custom) | Use audio and motion conditions together. |
| Manual only | Use only ranges you define yourself. |
| Remove all | Keep only add-in ranges in advanced workflows. |
If you upload an audio-only file, motion and subtitle-based methods are not available.
Step 4: Adjust Threshold, Margins, and Silent Action
Threshold
Threshold decides what counts as silence or stillness. If it is too aggressive, sentence endings and natural breaths may disappear. If it is too gentle, almost nothing changes.
Start with the default, run Preview, then adjust based on the result.
Margins
Margin Before and Margin After keep a small amount of time around detected cuts. If cuts feel too abrupt, increase the margins. For lessons and explanations, a small 0.1-0.3 second margin often feels more natural than a hard cut.
Silent Section Action
Silent sections can be handled three ways.
| Action | Result |
|---|---|
| Remove | Cut the silent section. This is the common choice. |
| Speed Up | Keep the section, but make it pass quickly. |
| Mute Audio | Keep the section, but mute its audio. |
If you use speed changes, also check Maintain original pitch so the voice does not sound unnaturally high or low.
Step 5: Use Preview to Check the Reduction
For file uploads, click Preview before starting the render. Preview shows the expected edit as numbers instead of rendering the whole output.
Review these values:
- Original duration.
- Edited duration.
- Reduction percentage.
- Silent segment count.
- Sounded segment count.
If the reduction is too large, use less aggressive threshold settings or increase margins. If almost nothing changes, adjust threshold, consider motion detection, or add manual ranges.
Step 6: Choose an Export Format
MP4 is the default result for video. For audio-only input, WAV and individual clips are available.
For video work, choose the export that matches your next step.
| Export Format | Use It For |
|---|---|
| MP4 | A result video you can review or share. |
| WAV | Audio-focused output. |
| Premiere Pro / DaVinci Resolve / Final Cut Pro | Continue fine-tuning in a professional editor. |
| Shotcut / Kdenlive | Continue in an open-source editor workflow. |
| Individual Clips | Download cut sections as a ZIP of clips. |
Treat editor timeline exports as intermediate files for additional editing, not as the final video itself.
Step 7: Check Credits and Start Editing
In the Credit panel, review Available Credits, Rate, and Estimated Cost.
Before starting, check:
- Does the detected source duration look right?
- Is the estimated cost within your available Credits?
- If you used URL input, do you understand the additional surcharge?
- Did you keep a copy of the source file?
- Did the preview result avoid cutting too aggressively?
When ready, click Start Editing. The page shows progress while it analyzes, edits, renders, and uploads the result.
Step 8: Download and Review the Result
When processing finishes, download the result from the completed card. Play it from start to finish and check:
- Did any sentence endings get cut?
- Do captions and scene transitions still feel aligned?
- Do cuts feel too abrupt?
- Were the long pauses reduced enough?
- If exporting to an editor, do the timeline name and file package make sense?
If the result is too fast, increase margins. If it is still too slow, adjust threshold and render again.
Troubleshooting
I see “Unsupported file format”
Check that the file extension is MP4, MOV, AVI, MKV, WebM, WAV, MP3, M4A, OGG, FLAC, or AAC.
I cannot click Preview
Preview is currently for the file upload flow. If you selected URL input, download the media file first and upload it directly.
Start Editing is disabled
Check sign-in status, upload completion, media duration detection, and available Credits.
Sentence endings are being cut
Increase Margin Before and Margin After, and make the threshold less aggressive. Removing every tiny breath can make explanation videos feel unnatural.
The edit barely changes anything
Adjust threshold, try motion detection for video, or use advanced manual cut-out ranges when you know exactly what should be removed.
Next Steps
After creating an auto-cut result, continue with the next workflow.
| Next Task | Tool or Flow |
|---|---|
| Create a new video from cleaned audio | Audio input in Create New Video |
| Burn subtitles into the result | Subtitle Burner |
| Add a logo or final mark | Watermark / Logo tool |
| Learn how to choose a silence removal tool | 6 Things to Check Before Choosing a Silence Removal Tool |
Think of silence removal as the first cleanup pass for long source material, not only a final finishing trick.
Frequently Asked Questions
Does Auto Cut Editor overwrite my source file?
No. It creates a new result file for download. Still, keep your source file in a separate folder so you can re-edit with different settings.
Should I remove every silent moment?
No. Keep pauses that help emphasis, screen reading, or scene transitions. Use Preview and margins together.
Can I use audio files?
Yes. WAV, MP3, M4A, OGG, FLAC, and AAC are supported. Audio files cannot use motion detection, and some export formats are limited.
Tutorial Complete!
You've read this tutorial. Move on to the next step.
Add a Watermark or Logo to a Video
Preview and Reuse Caption Styles with Subtitle Style Editor
Found this tutorial helpful?
Subscribe to get notified when we publish new tutorials and guides. No spam, unsubscribe anytime.
Comments
Please login to leave a comment
LoginNo comments yet. Be the first to comment!