

What you will prepare
This is not a click-by-click UI walkthrough. It is a revision-pass checklist for the moment after a VMAI video has been rendered and you are deciding whether to edit the completed result or rebuild from the beginning.
By the end, you will have:
- a list of scenes and settings to keep;
- one clear goal for v2;
- a decision about whether the pass is about text, media, captions/audio, or output settings;
- a cancellation rule for the editing session;
- a way to account for Credits, version limits, and final file selection.
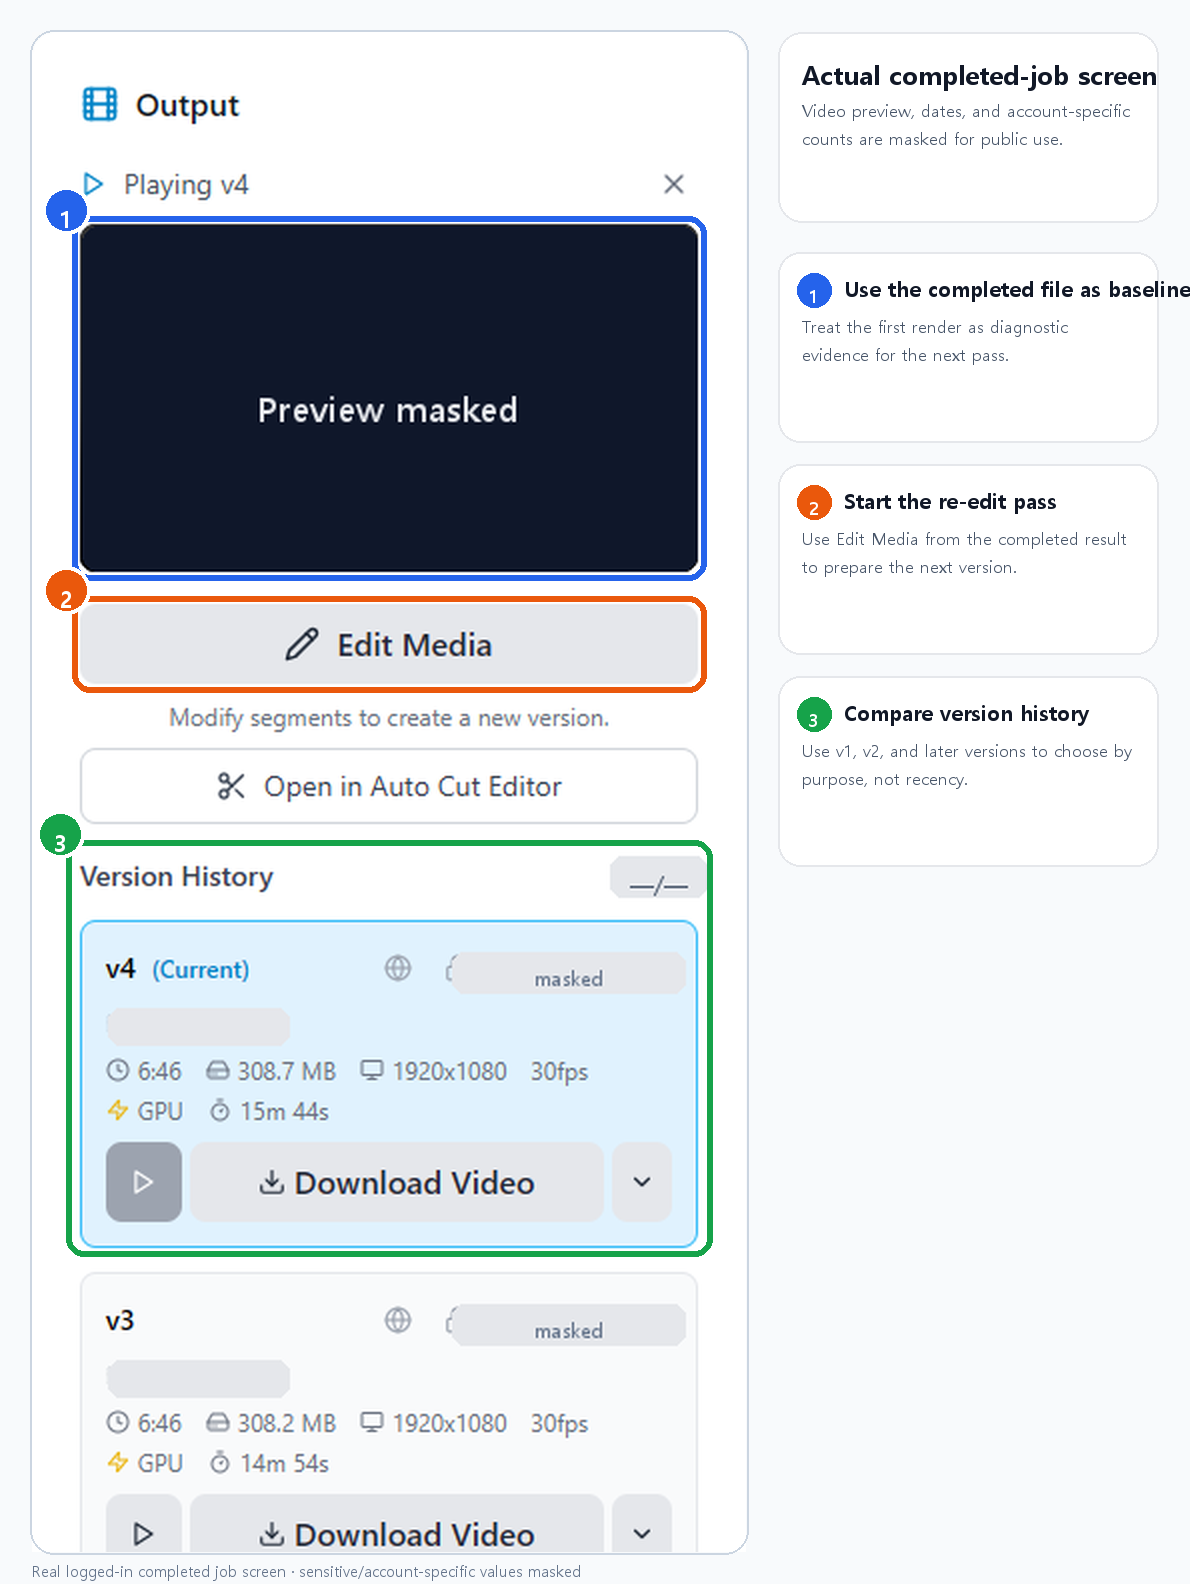
This is a real logged-in output panel from a completed job. The public image excludes areas that show the job title and recent projects, and masks the video preview, dates, and account-specific storage counts. Use this screen to treat the completed file as your baseline, start the re-edit pass, and compare v1, v2, and v3 in Version History.
Step 1: Name the role of the current version
Start by naming the file you already rendered.
| Name | Meaning | Next action |
|---|---|---|
| v1 review | The first file used to inspect the full flow | Mark problems and choose the v2 goal |
| v2 revision | A file that fixes one focused issue | Compare against v1 |
| v3 delivery | The file intended for upload or handoff | Confirm export settings and captions |
Without this naming step, every file starts to feel like “final_final_really_final.” The name is not decoration. It records why the version exists.
Step 2: Mark what should stay unchanged
If you only hunt for problems, you can accidentally change the parts that already work. Start by marking what should stay.
Ask:
- Which scenes communicate the message clearly?
- Where do narration and caption timing already feel natural?
- Which brand images, product shots, or uploaded media must stay fixed?
- Which BGM or transition choices are already balanced?
Choosing what to keep first makes the revision safer.
Step 3: Sort problems into four buckets
Put each issue into one of these buckets.
| Bucket | Example problem | Area to review in VMAI |
|---|---|---|
| Content | Scene order feels off, sentence is too long | Segment text, script flow |
| Media | Visual does not support the explanation, motion is too strong | Media choice, uploaded images, motion clips |
| Captions/audio | Captions are long, BGM is too loud | Caption lines, voice, BGM, subtitle burn-in |
| Output | Aspect ratio, resolution, or format does not fit the destination | Render settings, format, FPS, codec |
For v2, choose one bucket first. If this is a media pass, change media and motion only. Save subtitle styling for a later pass.
Step 4: Write the v2 goal in one sentence
A strong revision goal is narrow and testable.
Good examples:
- “In v2, replace only the visuals in segments 3 and 5 to make the product explanation clearer.”
- “In v2, turn on burned-in subtitles and check whether position and font size work on mobile.”
- “In v2, switch to vertical output and check whether anything important is cropped for Shorts.”
Weak examples:
- “Make the whole thing better.”
- “Fix captions, images, BGM, and aspect ratio all at once.”
- “Keep regenerating until it feels right.”
The narrower the goal, the easier it is to compare v1 and v2.
Step 5: Decide when to cancel the edit session
Before editing, define what would make you stop. VMAI's cancel-edit flow warns that changes made in the session, including segment reorder, split, merge, text, and media changes, will be discarded and the previous completed version restored. That makes cancellation a useful safety rule, not a failure.
Use rules like:
- cancel if a scene you meant to preserve becomes worse;
- cancel if you start changing issues outside the current pass;
- cancel if you can no longer explain the v2 goal;
- split the work into another pass if Credits or version limits become a concern.
Step 6: Check Credits and version limits
When a completed video is edited into another version, plan-based version limits apply. In the current VMAI settings, Free supports up to v2, Creator up to v4, Pro up to v8, and Team supports unlimited versions. Credit usage can also change with render mode, duration, resolution, captions, and motion settings.
Before you revise, ask:
- Does this pass really need a new render?
- Can a lower-resolution review render answer the question first?
- Is the next version supposed to be final, or another review file?
- Which versions need permanent storage, and which are temporary review files?
If the export decision is still unclear, start with Plan AI Video Render Settings Before Export.
Step 7: Leave a comparison note
After v2 is rendered, do not judge from memory. Compare with a short note:
- Did the problem you targeted actually improve?
- Did the scenes you meant to keep stay intact?
- Did the revision introduce a new issue?
- Is the file closer to the publishing destination?
- If another version is needed, can you explain why in one sentence?
This helps you choose the final file based on purpose, not recency.
Final checklist
Before starting the revision, confirm that:
- the current file is named as a review, revision, or delivery version;
- scenes and settings to keep are marked first;
- the problem is sorted into content, media, captions/audio, or output;
- the v2 goal is written in one sentence;
- cancellation criteria are clear;
- Credits and version limits are checked;
- the v1-to-v2 comparison criteria are written down.
Next step
For the strategy behind this workflow, read Stop Rebuilding AI Videos: Use a Version Pass Instead. If the source brief is still weak, go back to Create a One-Page AI Video Production Brief before spending another render.
Tutorial Complete!
You've read this tutorial. Move on to the next step.
Create a One-Page AI Video Production Brief
Plan a Reusable Media Library for AI Video Projects
Found this tutorial helpful?
Subscribe to get notified when we publish new tutorials and guides. No spam, unsubscribe anytime.
Comments
Please login to leave a comment
LoginNo comments yet. Be the first to comment!